Applying eyelash extensions at home seemed impossible. I used to get them done by a lash technician, either 3D or 4D lashes. Then, one day, DIY cluster lashes from the brand Nanolash caught my eye. I was dying to try them out!
After wearing lash extensions for years, my natural lashes looked barely noticeable, became dull, short and sparse. My lash tech suggested a long break but I was heartbroken. How to go shopping or go to work with lashes looking like they’re not there!
I’d been looking for a solution for a long time. Mascaras failed to produce desired effects. Semi-permanent lash extensions were out. DIY Lash Extensions were my last resort. Was I happy with the result?
DIY Eyelash Extensions, one product in two versions
Encouraged by positive reviews from girls who’ve tried the DIY Eyelash Extensions, I placed my order at the Nanolash website. I was spoilt for choice! There were two options to choose from:
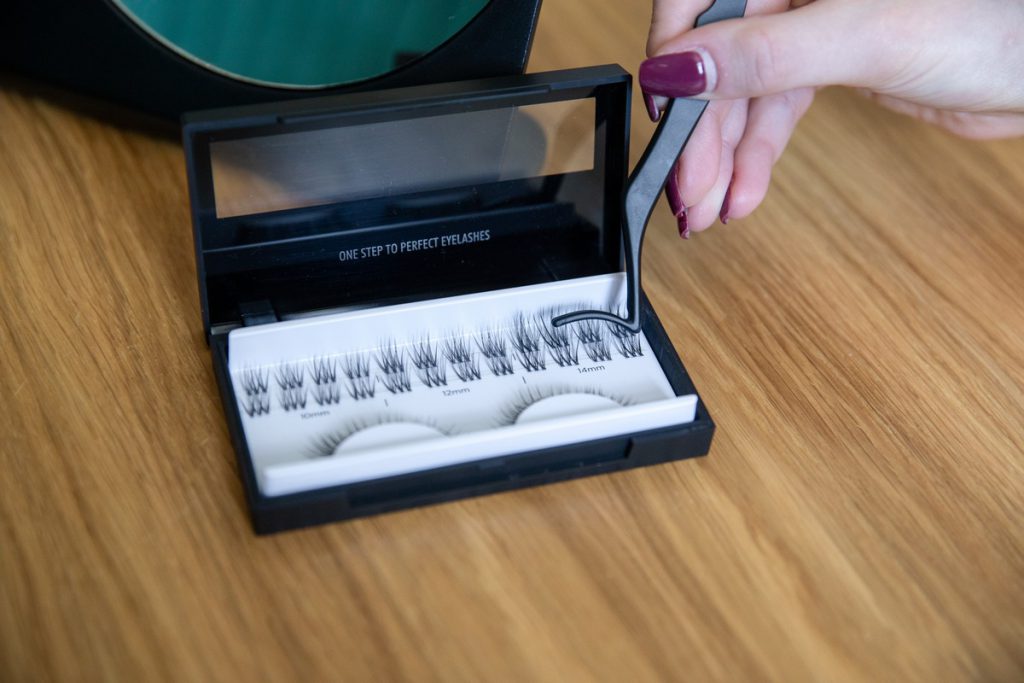
- pack of DIY cluster lashes: 36 pieces in three lengths 10 mm, 12 mm, 14 mm, and eight styles to choose from.
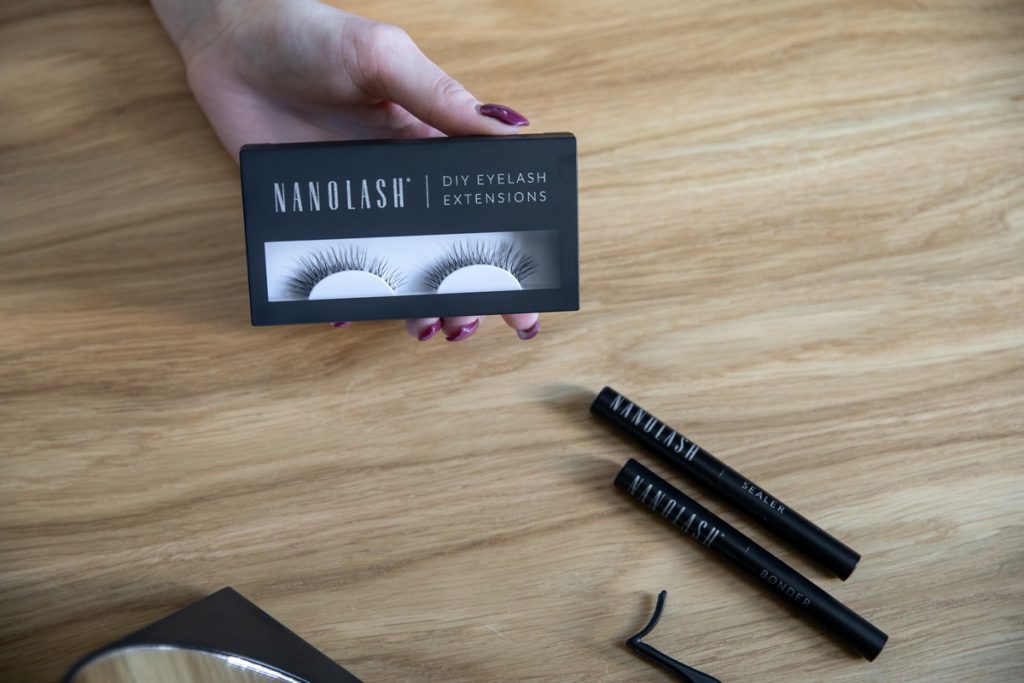
- cluster lashes kit: in addition to cluster lashes, there’s a bonder, sealer, remover and lash tweezers.
Eventually, I picked just the cluster lashes case. I had all the essentials at home.
I must also add that according to the producer’s promises, we can wear the cluster lashes for up to five days while the application should take 10 minutes tops. Sounds tempting!
Did the application of the DIY Lash Extensions take me only 10 minutes?
Creating the most seductive lash fans in just 10 minutes? Dreams come true! I had to verify the promises. My timer started counting.
I applied the lash clusters following directions from the box. I removed my makeup and:
- applied a thin coat of the bonder all over the lashes; I waited for 30-60 seconds so that it could get tacky.
- I picked a cluster and placed it under natural lashes, as close to the water line as possible.
- I applied the sealer all over the lashes.
Stop the timer! The application of four lash clusters on both eyelids really took less than 10 minutes.
I used four per eye because I was after a natural-looking result for work. If you’re more into volume lashes, then go for five clusters. You’ll love the effect!
Eyelash extensions that last long. How long did I wear my Nanolash cluster lashes?
With reference to the product details, the DIY cluster lashes should stay untouched for five days, but I wore them for eight days. Shockingly, I think I could wear them for two more days.
The lashes didn’t fall out or bend and looked the way they did right after application. I think that sleeping on my back and removing makeup gently were the things that made the lash extensions last longer.
The manufacturer also points out we can apply the lash clusters just once. Again, I proved it’s not true. The DIY cluster lashes looked perfect after I took them off. I cleared them of the glue using the remover and applied the same wisps again!
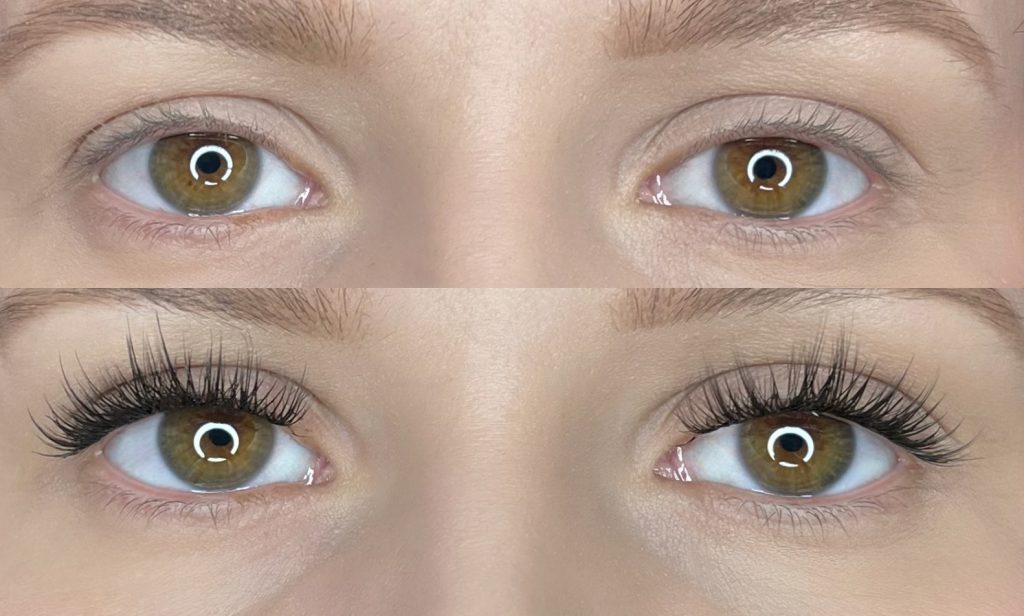
I chose the Innocent model because it creates a delicate and natural styling that is perfect for everyday makeup.
DIY Eyelash Extensions – solution to my lash problems
Wearing Nanolash DIY cluster lashes, I changed my mind about eyelash extensions. The fact that I can apply cluster lashes all by myself and whenever I feel like it is the greatest benefit of the product.
The easy application taking less than 10 minutes and the ability to wear the clusters for many days make me think these are the best cluster lashes I’ve ever tested. I highly recommend DIY Eyelash Extensions because they’ve solved my problem with weak, barely there lashes!